Please make sure your server meets the system requirements and that you start from a fresh WordPress installation, without any plugin(s). If updating from Vice 1.0 please check the updating page.
VICE 2.0 IMPORTANT NOTIFICATION
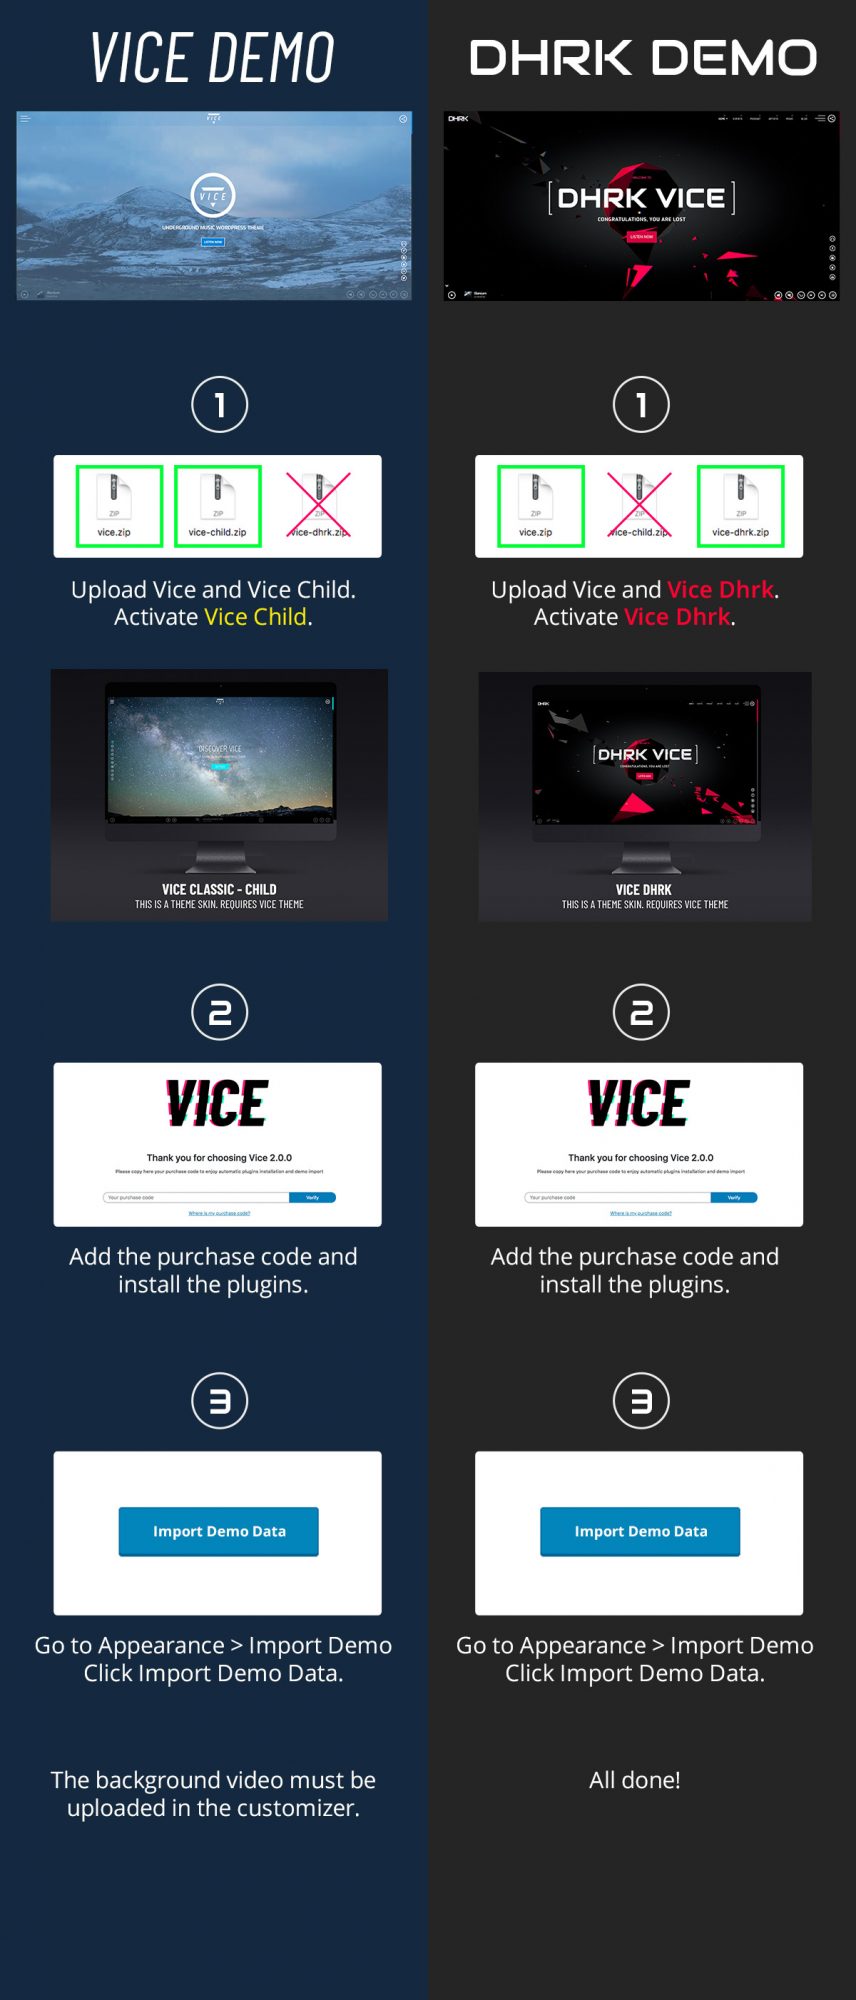
Since Vice 2.0 you can choose among the Vice Classic and the Vice Dhrk style. This choice depends on the Child Theme you will install and activate. You can switch anytime. The customizations are linked to your active theme, so colors, logos and font choices will stay connected to the theme that is active while customizing it.
If you switch to another child theme, you will need to recreate your customizations in Appearance > Customize.
How to install the theme
- Login to your website in /wp-admin
- Go to Appearance > Themes
- Click Install Themes and then Upload
- Click on the “Browse” button and select the zipped folder of the theme from your computer.
- Upload the theme called vice.zip but DO NOT ACTIVATE IT
- Once done click on “Return to themes”
- Now, you get to choose from the new Vice Dhrk and the Vice Classic:
- For Vice Dhrk, Click “add new” and upload the theme vice-dhrk.zip
- For Vice Classic, Click “add new” and upload the theme vice-child.zip
- Activate vice-dhrk.zip or vice-child.zip
- Install the required plugins (next manual chapter)
Troubleshooting:
Error: The theme is missing the style.css stylesheet
If you see this error, it means that you are trying to upload the entire product package instead of the simple theme zip file. Please unzip the product folder in your computer and upload only the theme zip file and the child theme’s zip file.
Error: Are you sure you want to do this?
Please check system requirements.
Wrong theme installation
Do NOT upload the zipped file via FTP/CPANEL and unzip the theme folder on the server manually, as this usually leads to wrong file permissions on files and folders, and cause problems as missing fonts and unaccessible template parts.