In this chapter you will learn how to correctly set up your Shoutcast channel to display the song titles and artist information.
If you are unsure about your type of server, you should ask your streaming provider.
We know this explanation may result a bit long and articulated, but setting up a streaming source is not always straight forward, because there are no strict standards, and every provider has tiny little differences, so we will cover any possible case and guide you through the process.
IMPORTANT! Please remember that you can’t play the stream or display the titles from an HTTP stream if your website uses the HTTPS protocol.
How to set a Shoutcast radio channel
Step 1: In your WordPress Admin, under Radio Channels, create or edit your Radio channel.
Step 2: make sure Metadata is NOT selected.
Step 3: Make sure your Shoutcast version is at least 2.
Important: Shoutcast V1 is not supported as is dismissed since 16 years and is highly insecure. If you have a Shoutcast V1 server, you can use the Metadata instead, but please be aware that Shoutcast V1 is highly insecure. More info
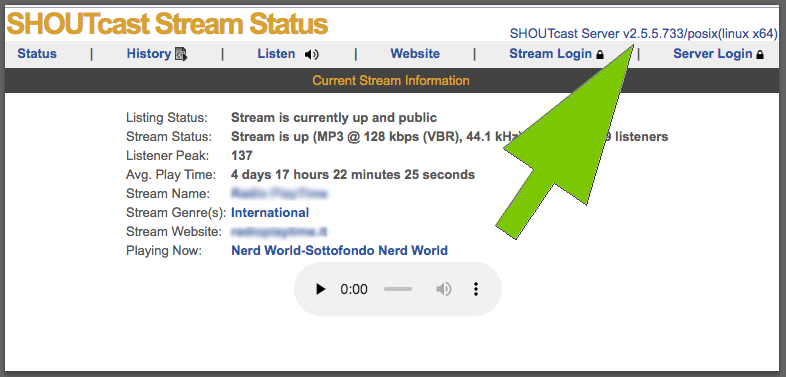
What is my Shoutcast version?
The version of your Shoutcast is written on the top right corner of your Shoutcast page
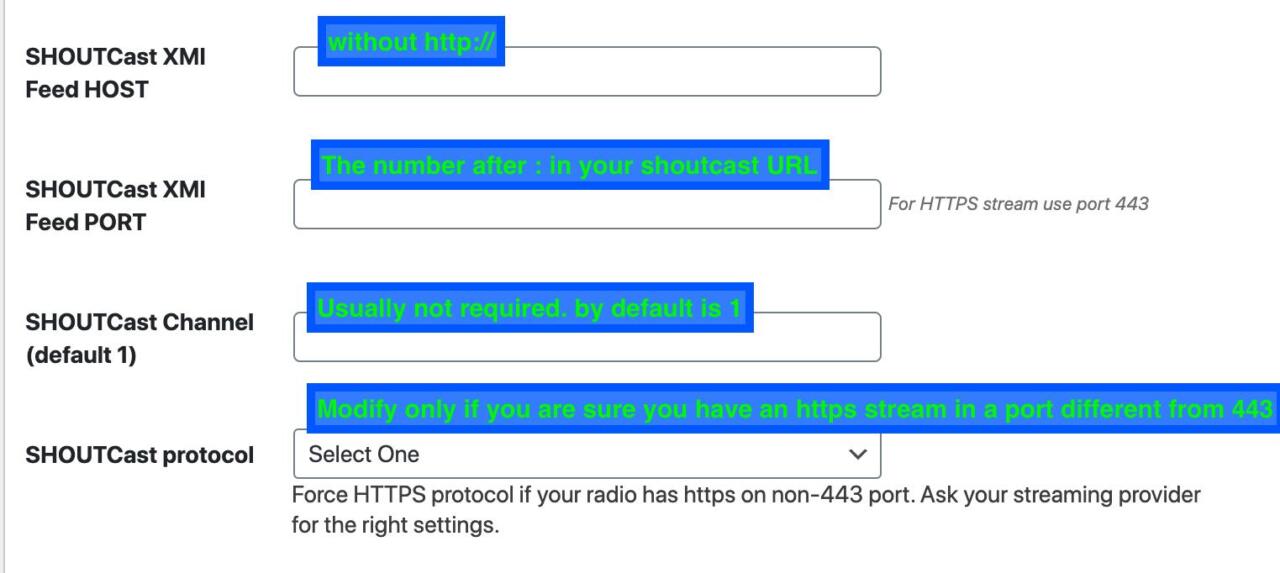
To set a Shoutcast channel, you will need the following fields:
So, if your Shoutcast URL is for instance
http://5.135.191.40:8000/
The MP3 stream URL is /stream
http://5.135.191.40:8000/stream
To display the titles:
- Host: 5.135.191.40 ( without http:// )
- Port: 8000
- Protocol: default or automatic
- Channel: by default is 1, but you can specify another number if you have a multi-channel Shoutcast. To know your channel number, you should copy your Shoutcast json data (more info below) on the website http://jsonviewer.stack.hu/ and click “Viewer”, it will display the content in a readable format, where you can chount the channels and find your ID. Please remember that the first channel ID is 1 (not 0). In alternative, ask to your streaming provider.
How to verify your Shoutcast URL and information:
There is a standard URL used by Shoutcast to display the Json information (only Shoutcast 2 and above) which is the following:
http://[your server url and post here]/stats?sid=1&json=1
In the example above, “sid” is the Streaming ID, which is 1 by default but can be another number in case of multi-channel streams.
The parameter “json=1” instead loads the Json formatting, which is much faster than the old XML and gives you a better performance.
So, you can usually copy
/stats?sid=1&json=1
and paste it after your streaming page URL. The result should be something like this:
Verify your json data
It rarely happened to find radio channels with a broken “json data”. This means that the URL “stats” opens the json but it is unreadable, returning a console error.
To verify if your JSON is correctly formatted, copy the code in the website http://jsonviewer.stack.hu/
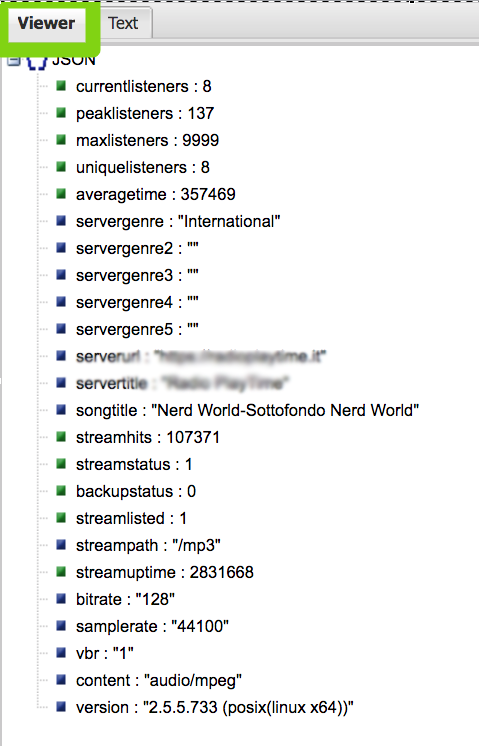
Then click “Viewer”
![]() You should see something like this:
You should see something like this:
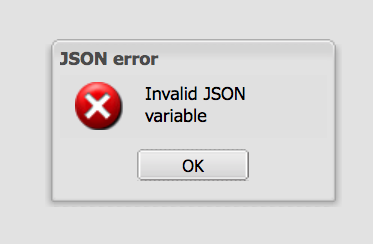
If instead you see an error, like this:
it means that your JSON formatting is broken, and this is usually caused by a software error on your streaming server. You should take some screenshots and contact your streaming provider, asking them to fix it.
Force HTTPS option:
This option is required for the providers allowing HTTPS connection on non-standard ports.
Usually, the only HTTPS port is 443. But, if your Shoutcast has HTTPS on some custom port as 15550 or anything else other than 443, and you are sure that the HTTPS connection is there, then use the “force https” setting.
Otherwise, the player will automatically use HTTPS for the 443 port, and HTTP for any other.
Troubleshooting:
- If your website is HTTPS and your stream is HTTP, you generally cannot display titles, nor listen to the music. In this case you may want to put the site in http or change streaming provider.
- If your stream is HTTPS, your website is HTTPS and your shoutcast page is HTTP, you generally cannot display titles without using a proxy. It would be much better if you use a streaming provider that gives you HTTPS access, but you can also try our proxy (enable the proxy in the Customizer settings, under the Radio section)
- If the proxy doesn’t work either, please ask your website hosting provider (where you bought your domain and/or hosting) to make sure that your website can connect, server side, to the port of the shoutcast channel.In the example above, the channel is 8000, so you need to verify with your website server provider that your site can connect, server side via cUrl, using the port 8000.
- If your streaming provider has an HTTPS stream but the certificate is invalid, your browser will refuse the connection, for obvious security restrictions. You can verify this condition by opening the https url of your Streaming page on the browser.
- If you need help setting up your radio, please contact our helpdesk.
- As last resource, you can use the Metadata server type instead of Shoutcast.


